Detecting Doodads
  • Store
  • COLORS
  • About
  • Contact
  • ViDEOS
  • Product Ideas
  • Links
  • Blog
  • CLUB DISCOUNTS

DooDaddy's Blog

Thank you for visiting Detectingdoodads blog.
We are continually improving and introducing new products, posting special sales offers, announcing contests for free doodads ect.
 This is the place to keep up with the latest happenings here at detectingdoodads.

For Inquiries Click here

Recovering, Preserving and Displaying History

12/5/2020

2 Comments

 
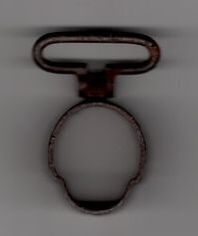
I dug up this rusty civil war musket barrel band.
Picture
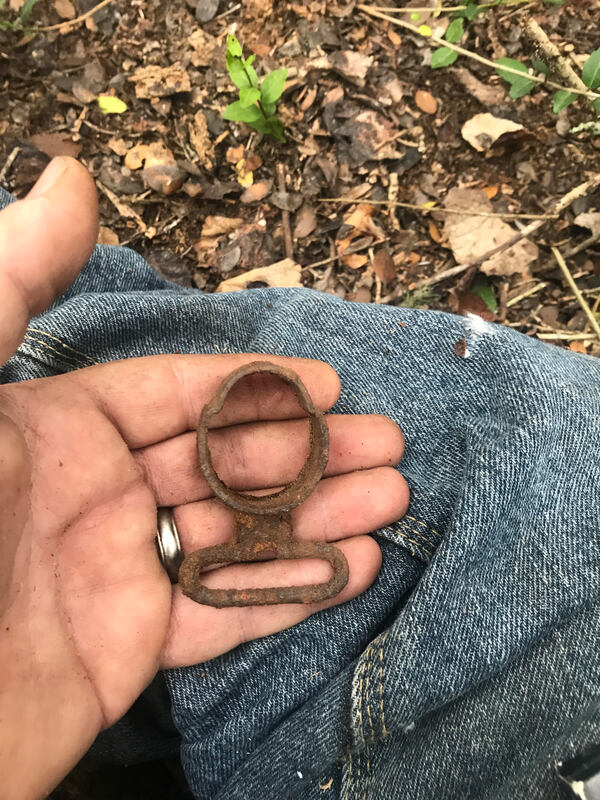
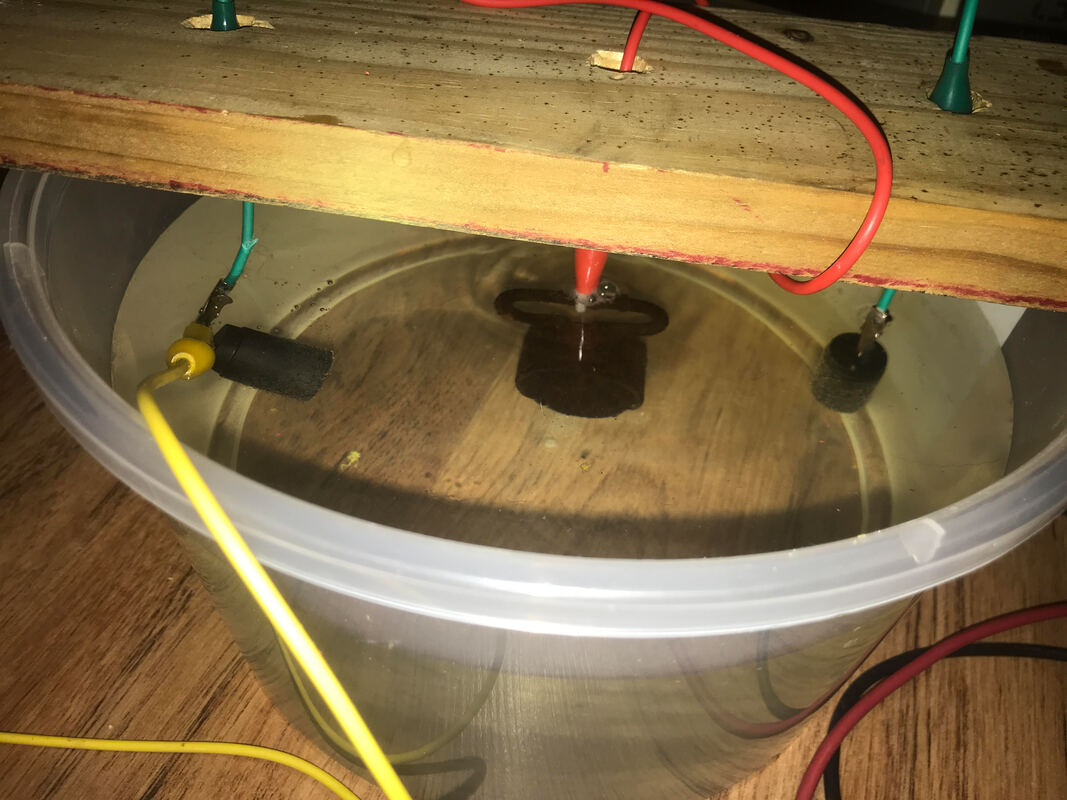
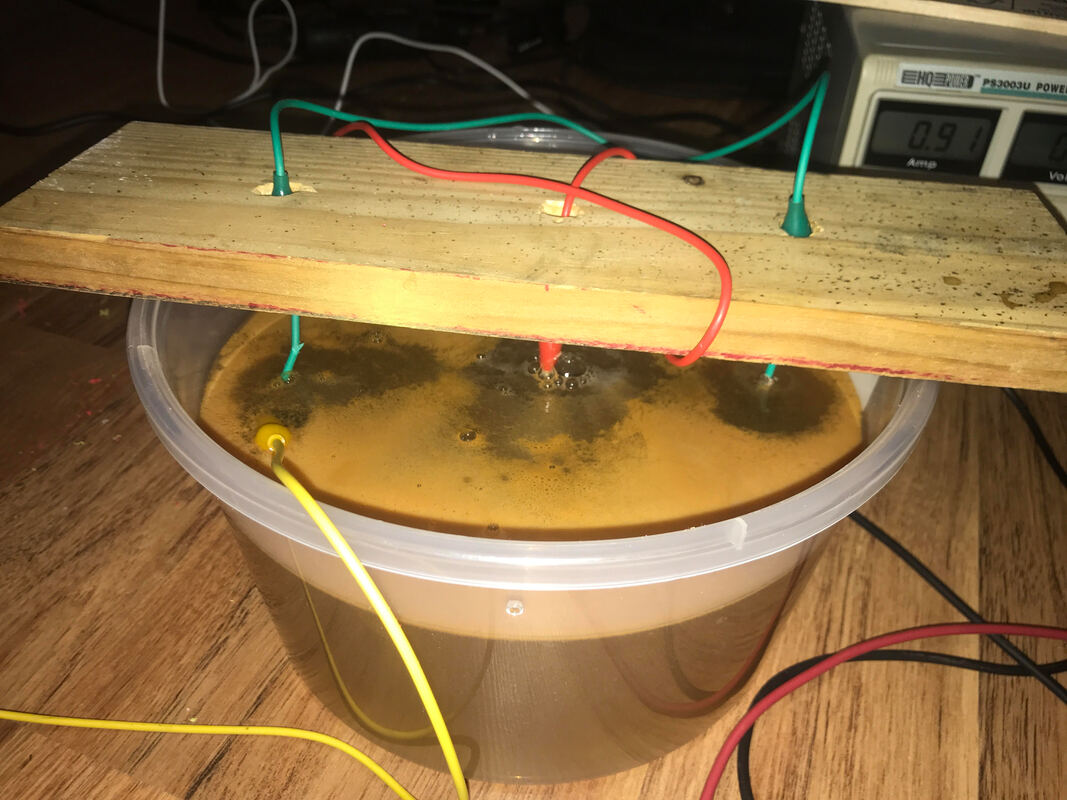
Restoring it with electrolysis.
Picture
Picture
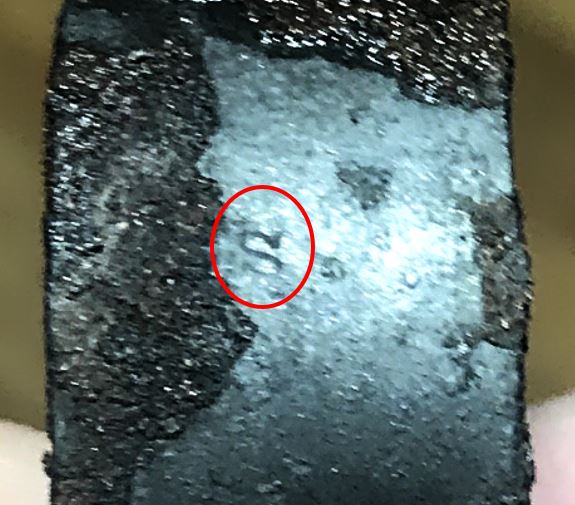
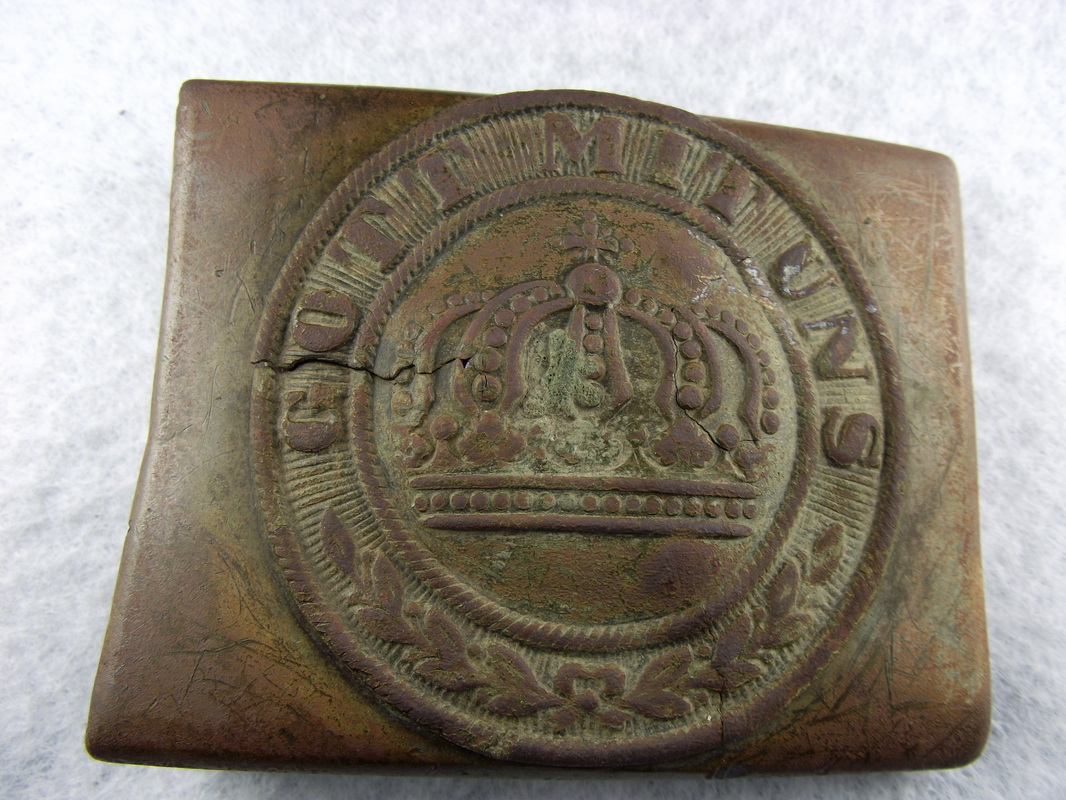
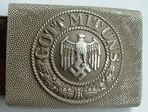
After an hour, progress is checked. I discover that it is stamped with an "S".
This is either an inspectors mark, or the English factory S stamp meaning unserviceable arms sold out of the service. Since England officially didn't support either side during the civil war, this was used by arms traders as a way to export them from England to the states without "officially" supporting the war efforts.
It is amazing after 150+ years in the ground, this rusty relic still has a story to tell, through the magic of electrolysis.
Picture

Building the display

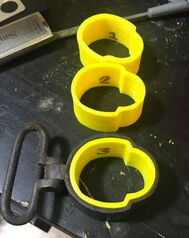
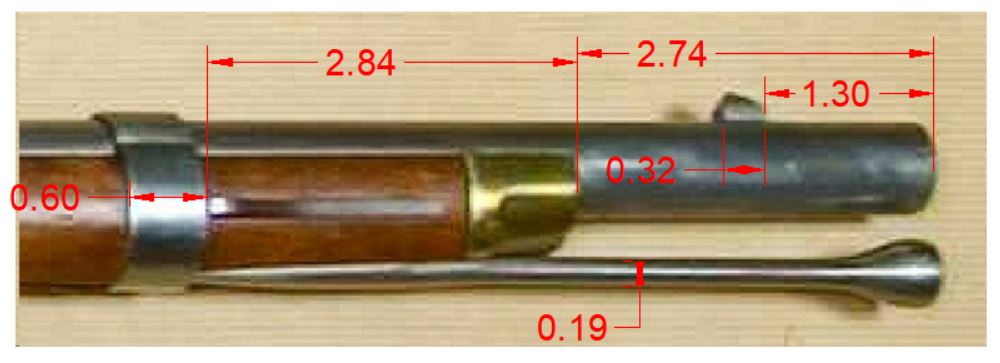
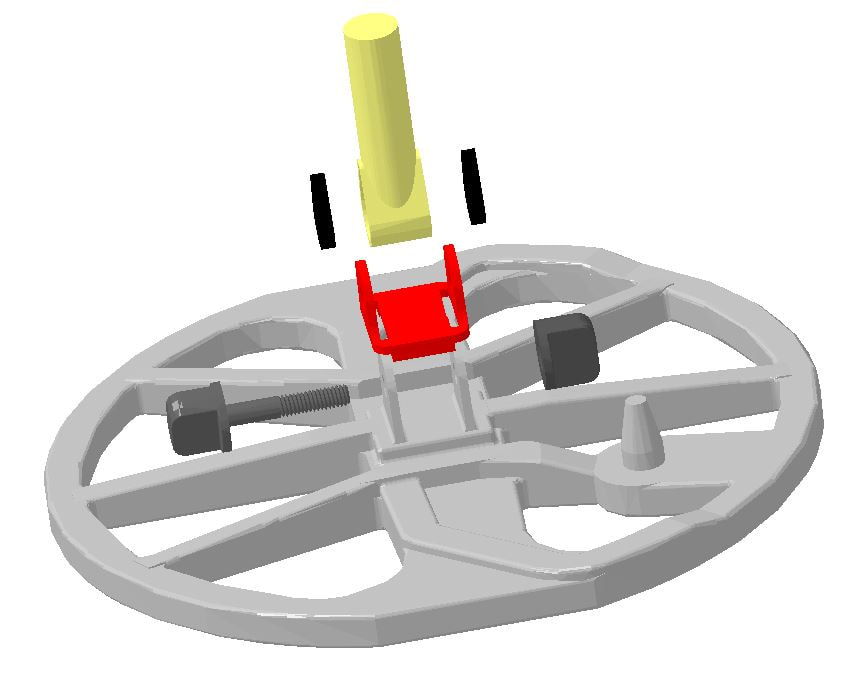
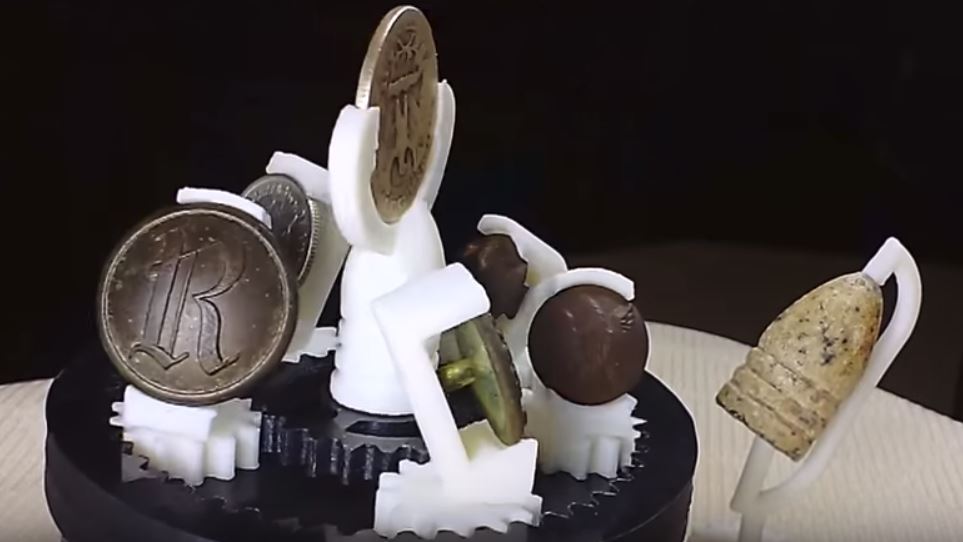
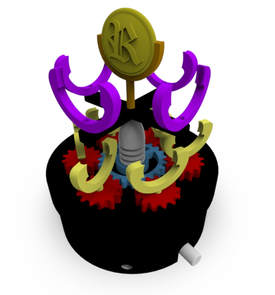
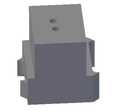
 Since many people cant picture this piece in it's context, I want to make a display that is a portion of the musket. First I need to reverse engineer the piece so it is dimensionally correct.  That process is started as a simple scan of the part, dimensions are taken and the scan is scaled. 3d printed gauges are made to check
fit. The third adjustment fits perfectly.
Picture
Picture
Picture
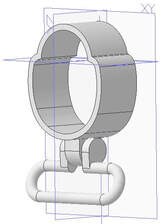
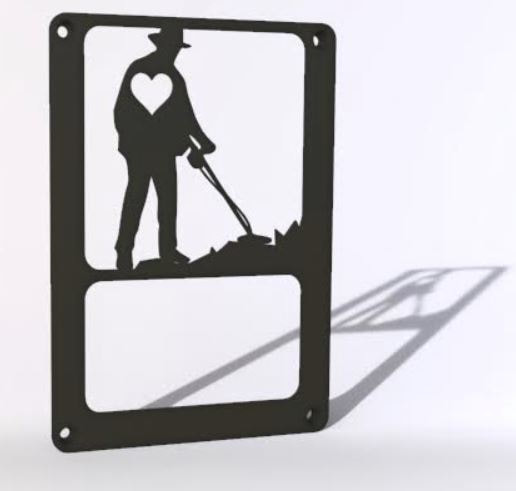
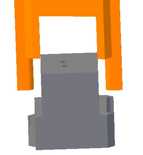
Now extrude the profile for the stock and barrel. Scaling dimensions from a musket.
Picture
Picture
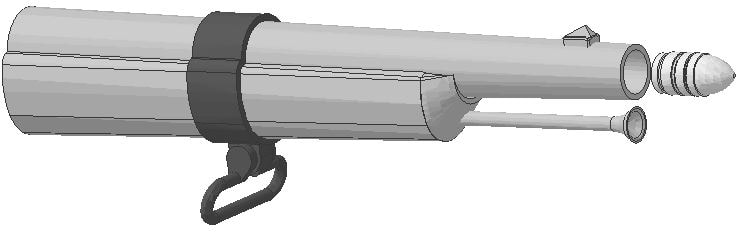
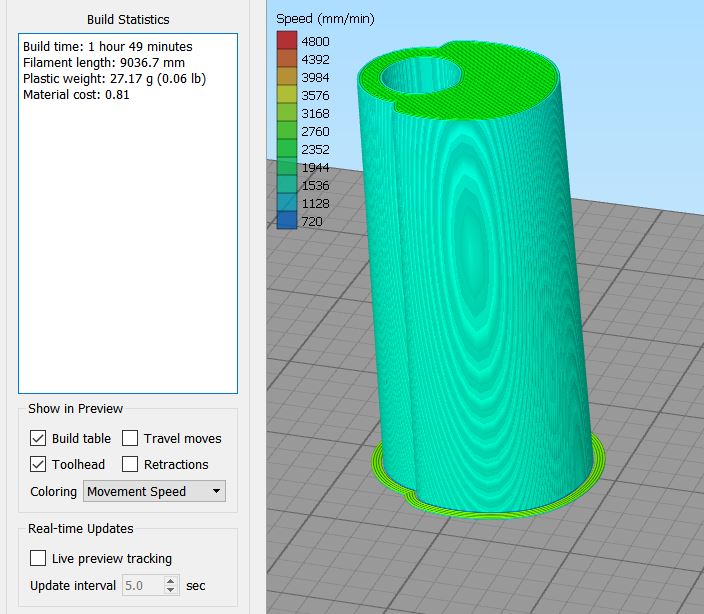
Now it is ready to print.  To paint, or not?
Picture
I decided painting the display would distract from the actual recovered barrel band, Leaving the display grey would highlight the actual artifact. Lets print it...
Picture
Picture
Picture
printed and being painted grey
Picture
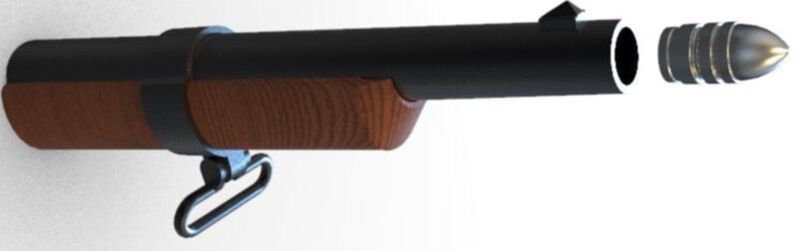
The finished product..... Notice the rifling in the barrel.
Picture
Picture
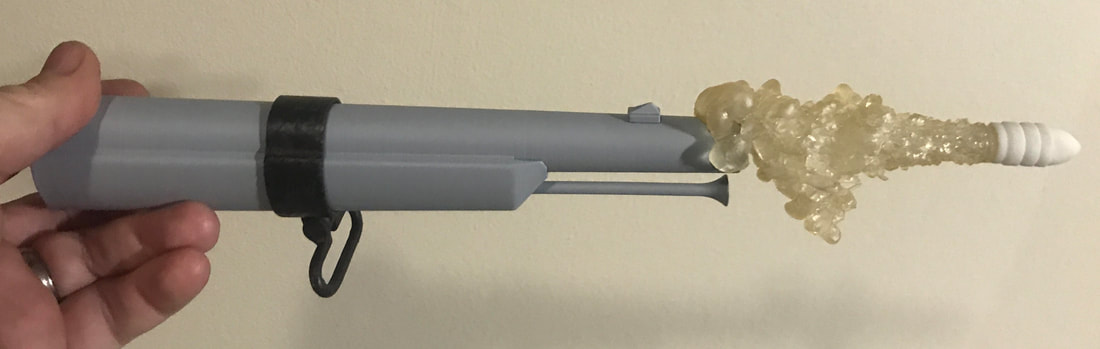
​Next I think I will resin print some translucent smoke to hold the bullet away from the barrel. Stay tuned....
Picture
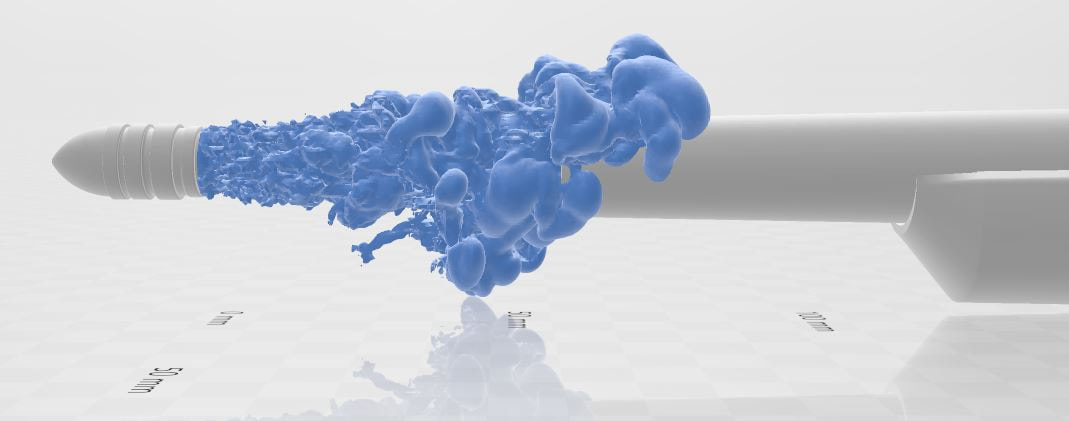
UPDATE:  Printed the smoke. It was too translucent. It looked like water. So I over-cured it in UV light to yellow the resin up a bit. What do you think?
Picture
2 Comments

Nokta Makro Simplex +

8/26/2020

0 Comments


Flashlight Doodad

The Nokta Makro Simplex is a a feature packed detector.
Waterproof
Updatable firmware
Wireless headphones
Bluetooth communication with the pulse dive pin-pointer
Vibrating tones
Multiple coil selections
Built in flashlight.
​
​But like any thing new, we all suffer from the "yeah, but what if's". 
As great as it is to have a machine with a built in flashlight, I personally wish it was brighter with more functionality.
Of course making it brighter the conventional way would mean more battery power drain on the machine which would shorten the time we could be detecting. And I won't stand for less time detecting!

So We invented the lite-brite for the Simplex.  This Doodad makes the built in flashlight 3 times brighter WITHOUT ADDING ADDITIONAL BATTERY DRAIN.
This is accomplished by optically magnifying the existing light beam supplied by the built in flashlight.
The high quality German made glass lens has anti-scratch coating and is held in a 3d printed frame attached
to the detector. The design provides the correct focal length of the light beam to increase the brightness
while providing beam coverage of the coil / target area.
The frame holds the glass lens in tension. It is secure, yet can be easily removed to use as a regular jewelers loupe to examine your finds close up. used as a loupe, the magnification is 5x.

Please watch the video below....

Click here to order
0 Comments

Eliminate broken coil ears

10/5/2019

8 Comments

 
The Equinox is a great machine but, like all things, nothing is perfect. This is where Detecting Doodads comes in.  We specialize in listening to the users of all various makes and models of fine detecting equipment to improve shortcomings. Detecting Doodads does not make better detectors, rather we make detectors better.
There have been numerous reports of the equinox coils breaking at the ears.
While I am a proud owner of this machine, I have not experienced this but have seen plenty of pictures of broken ears.
Many requests have come in wanting us to design a method of salvaging a coil that has succumbed to the broken ear syndrome. We are working on that. I hate patches though.
I would rather answer the question of why they break, and develop a solution so they don't break in the first place.  
Picture

Precise reverse engineering of the components begin to reveal the issues.

Picture
Picture
The ears are too thin and the shaft does not transfer the forces to the face (strongest portion) of the coil.
​The bolts transfers all lateral forces into the ears.
Picture
There are two main issues that contribute to the ear breakage.
1. The lower shaft is not resting on the coil longitudinally. (unsupported area in the above graphic).
2. The ears are not thick enough to offer resistance to bending and ultimately breaking.

​So we developed this Doodad to fix those issues and eliminate ear breakage.
Picture
Slip this ear stiffener over the existing ears of the coil to eliminate ear breakage,
Its function is to double the ear thickness by adding external ear backup and eliminate the unsupported areas below the shaft.
Picture
Picture
The 6" coil and the 11" coil each need different support so Be sure to specify which coil you intend to install the ear stiffener on.
Picture
Picture

Equinox coil ear stiffener

$15.00
Shop
8 Comments

Any Jeep owners out there?

3/12/2018

3 Comments

 
I just got a Jeep Wrangler. I love this thing!  For us explorers, outdoorsy type's, hunters, and or detectorist, it is the ultimate exploration vehicle.  As such there are tons of aftermarket accessories available, but none that are geared towards the meal detectorist, until today.  How about custom taillight silhouette covers that will light up the night with metal detecting related images, every time you hit the brakes?
Picture
Picture
Picture
More designs are in the works. Coils shapes to represent our favorite manufacturer, and other cool designs. If you have a request, let me hear about it.
Picture
3 Comments

Relic Rotisserie

2/18/2018

0 Comments

 
Three years ago, I began toying around with ideas on how to display relics I would to show off in a kenitic
way.
In short order, I had a working prototype that used a planetary gear system to spin multiple items.
For whatever reason, I never did much with it after that. 
Recently a friend of mine asked if I thought I could display collectible marbles.
No problem.
Picture
I have it layered to display up to 10 marbles.
Picture
Here is a video of the Relic Rotisserie setup to display various buttons and coins.
It can spin most any item you have. Any coin, button, bullet, or whatever you may treasure.
0 Comments

Improved XP DEUS coil charger

12/30/2016

17 Comments

 
The XP Deus is a fantastic machine. However several of the physical design features could be improved.
The one I am tackling with this product development is the coil charging clip.  I am on my third factory clip.
The little contact pins break, or the plastic spring breaks. 
Picture
The clip is positioned on the coil by just a few points, not solid surfaces. This allows too much misalignment as you install the clip onto the coil. Misaligning it means you need to open the clip jaws beyond the limit of the plastic spring so it breaks. Now you find yourself wrapping rubber bands around the clip jaws, or other makeshift fixes.
Pushing down to make contact between the pins and the contact pads on the coil while misaligned will cause the spring pins to bend and or break.
If that happens, you will be out of luck. That's why most of us have two of these clips at all times.
They break, and usually at the most inopportune time.
Besides the breakage issues, I do not like where the USB plug is located. I find it is not the most convenient position. And since the clip jaws lock onto the bottom of the coil, the clip protrudes on the bottom. Many times I get it on the coil and charging, only to have it pop off when I set the coil down.
Picture
So to make a better clip, the design should incorporate the following features.
1. Eliminate the plastic spring.
2. Eliminate the spring pins.
3. Locate the clip to the coil using as many surfaces (not points) as possible so it fits       snug with no rocking.
4. Clip should not protrude below the bottom of the coil.
5. Move the USB port to be more accessible.
6. Beef the body up to make it generally less prone to breakage.

So I started by modeling up the section of coil this clip must fit.

Now I simply design a clip that fits the exact dimensions of every surface of the coil where needed.

Picture
It fits very snug. But for extra clip retention, I added a nylon thumb screw.
Now to find a replacement for the spring pins.  I tested larger spring pins but the first one simply fell out of its socket and the spring bounced out to freedom. The contact pads on the coil are only 3/16" apart. This limits the size of the mating contacts in the clip. After searching long and hard I found these cool gold plated nickel leaf spring contact modules. Leaf springs are single components that are very tough and forgiving.  This works really well.
The other component is the Mini USB socket. I found these nice break-out-board mounted units that give me good mounting and solder points.
Model those components, design them into the bottom half of the clip, split the assembly so I can put the two electronic components in and solder them together.  3D print the clip body, assembly and test it out.

Picture
Picture
Picture
It works great.  It fits snug enough that the thumb screw is not needed. 
It is rock solid on the coil without any rocking around.  This is due to the many surfaces the clip references on.
Picture
I ordered some more components to build a few more. I will continue to test this design out.
​ My goal is for this to be the best and only Deus charging clip you will every need to buy again.
Picture
17 Comments

Light hood for AT-Proluminator

10/19/2015

1 Comment

 
The AT-Proluminator addresses the only real shortcoming of the Garrett AT Pro and AT Gold detectors.
That being the lack of a back lit display.  It is that time of year again when daylight shortens and we find ourselves detecting in low or no light conditions.  The AT-Proluminator conveniently mounts underneath the control unit and the flexible light shaft is easily positioned to illuminate the display screen and control panel.
Now you can choose to add a 3D printed light hood that attaches onto the flexible light shaft. This hood focuses the light just were you want it. The colored transparent lens on the light hood diffuses the light.
Lenses come in red, blue, green, orange, yellow or purple.
This light hood is an accessory to the AT-Prolumintor. Both are sold separately.

Click here to visit the light hood product page.

disclaimer:
I trust you will not use this product to metal detect illegally at night. You must always have the proper permissions before metal detecting on someone's property. No night hawking.

​ 
Picture
1 Comment

Tether Rings make great group hunt prizes

10/19/2015

1 Comment

 
Picture
These custom 3d printed pin pointer tethers with built in jewelers loupe were made for the upcoming Civil War Preservation Project of Ohio group hunt.
Our products make great  prizes during group hunts like this. Customize the text as you wish.

Here is a video of the hunt.

1 Comment

Lots of customers prefer customized Text

6/29/2015

0 Comments

 
Picture
0 Comments

Prussian Empire military buckle saved

4/27/2015

0 Comments

 
Picture
Picture
I was hunting at a old farm that supposedly was owned by a Nazi who was caught and tried for war crimes. He just disappeared from his place in the 50's. The old farm house looks like he just vanished. 
Several Nazi tokens and German coins have been dug there.
So when I dug this buckle with 'Gott Mit Uns" on it I assumed it was Nazi from WWII but was baffled why it does not have a swastika.
Gott Mit Uns translates to "God is with us". 
When I got home and researched it, turns out it is way older than WWII
It is a non commissioned officers belt buckle from the Prussian empire's great military.

The medallion measures 50mm in diameter. From that we can date this between 1847 and 1895. 

When  I plucked it from the plug, the center medallion fell off due to the solder used to affix it, corroding and leaching into the ground.
As you can see, this medallion is on the verge of crumbling and disintegrating, it is very fragile and covered in cracks.
This demonstrates the value us metal detectorist's bring to the preservation of historic relics and artifacts.
If most archaeologist would have their way, this would have been left in the ground until it rots into an unidentifiable heap  of dust.

The design changed after 1895, the medallion was reduced to 45mm in diameter.
From 1895 through WWI and up until 1939, the Germans used the smaller design with the Prussian crown.
In 1939, they used the motto and the circumference design but replaced the crown with an eagle and swastika, like the example below

Picture
0 Comments
<<Previous

    Author

    Don Botting
    Don has been an avid metal detectorist for the last 12 years and a techno-geek for the last 30 years. Combining his engineering, design and manufacturing skills with his passion for metal detecting has resulted in useful products he can now make for you to use and enjoy as well.

    Archives

    December 2020
    August 2020
    October 2019
    March 2018
    February 2018
    December 2016
    October 2015
    June 2015
    April 2015
    March 2015
    December 2014
    October 2014
    September 2014
    August 2014
    July 2014
    May 2014

    Categories

    All
    Fisher
    Garrett
    Metal Detecting Accessories
    Metal Detector Camera Mount
    Minelab
    Pinpointer Tether
    Pro Find Tether
    Pro-Pointer Tether
    Tecknetics
    Tesoro
    Whites

    RSS Feed

Proudly powered by Weebly